About
Step-by-step guide to reviewing a student request in Perceptive Content.
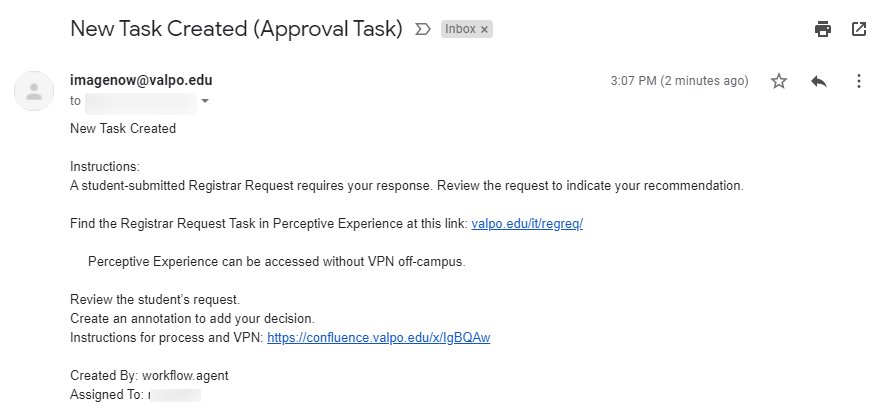
Email Notification of a New Task
When you have a new document to review, you'll receive an email from imagenow@valpo.edu with the subject: "New Task Created (Approval Task)"
- Click the link in the email to go directly to Perceptive Content.
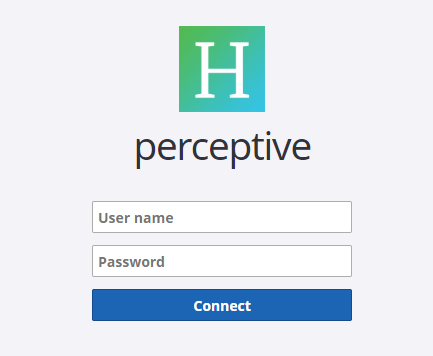
Logging in to Perceptive Experience
- Enter your ValpoNet credentials to login.
Opening a Document to Review in Tasks
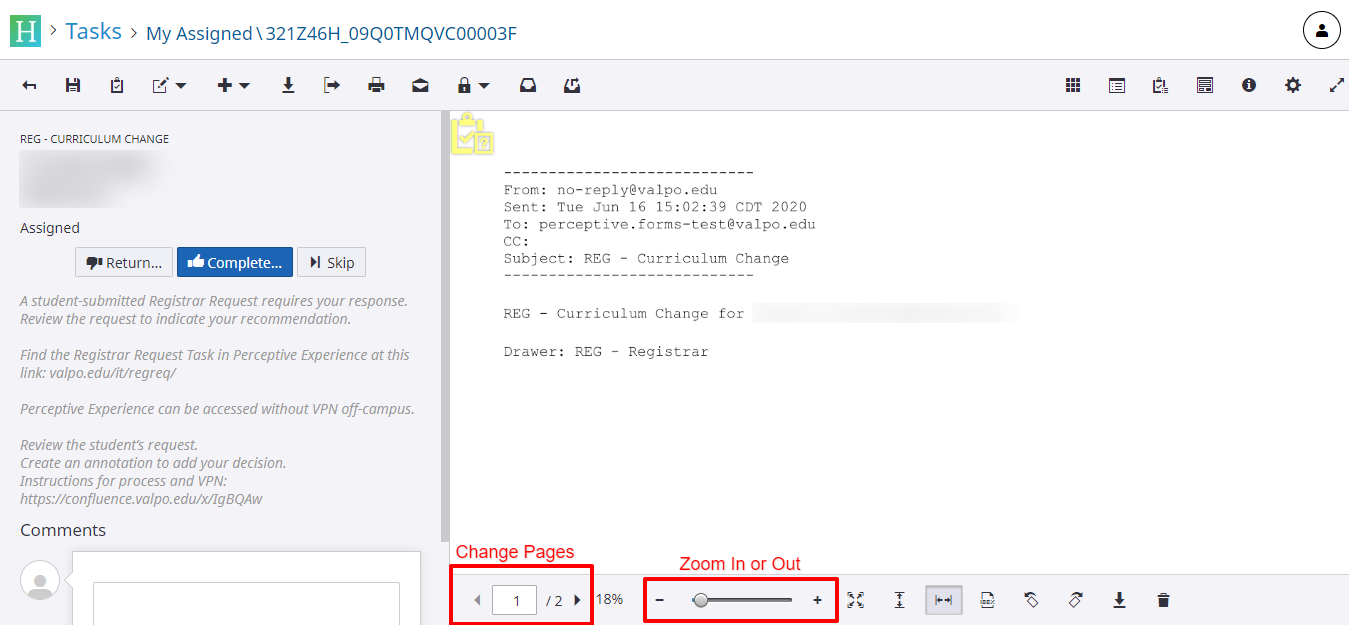
- Once in Perceptive Content, you'll see a list of your pending documents for review in your My Assigned list.
- Double-click the first item in the list; the list is populated in a First-In-First-Out/oldest document listed first sequence.
- The relevant document will open in the right hand side of the screen.
- Review the document, noting that there may be multiple pages to a single request.
- To change pages, use the arrow keys in the lower left corner.
- Zoom controls are in the center of the bottom of the page.
Annotating a Document (Adding your Decision)
After review, select the appropriate Annotation (Stamp) to the document to reflect your decision.
- Click the icon.
- Select Create Annotation.
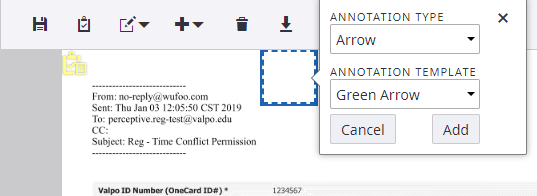
- Move your cursor to the location on the document where you'd like to place the annotation. Please do not cover a previous reviewer's annotation.
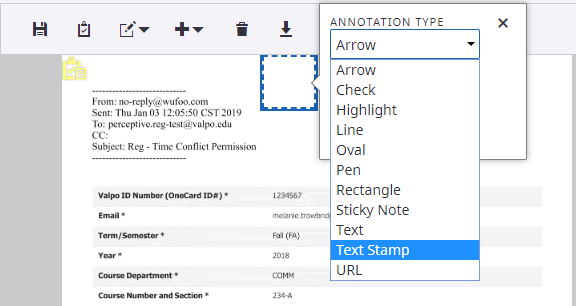
- Select Annotation Type of Text Stamp.
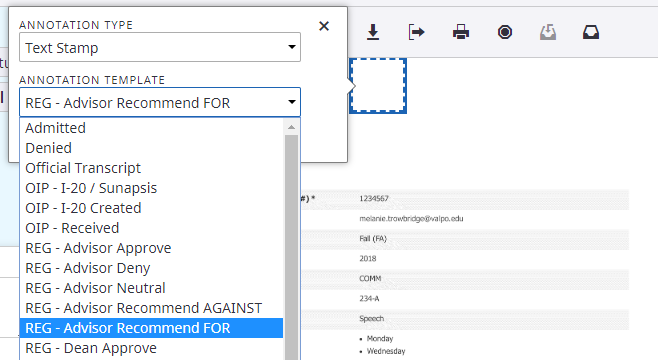
- Click the Annotation Template drop-down menu for your decision or recommendation.
- Select the annotation appropriate for the document
- Registrar requests use annotations with the prefix REG -
- Access and Accommodation requests use annotations with the prefix AARC -
- If you have multiple roles, choose your most senior position when selecting your stamp. For example, if you’re both an instructor and the department chair, select ‘Dept Chair.’
- Select the annotation appropriate for the document
- If you wish to add an additional comment to remain with the document, repeat the same process above, but select Sticky Note (instead of Text Stamp) to add free text.
Exam Accommodation Request Instructions
- If you agree to the student testing with the AARC and have selected the stamp: "AARC - Test w/AARC - Agree to Accom"
- You can include the exam for the student to take for the Access & Accommodation Resource Center to administer
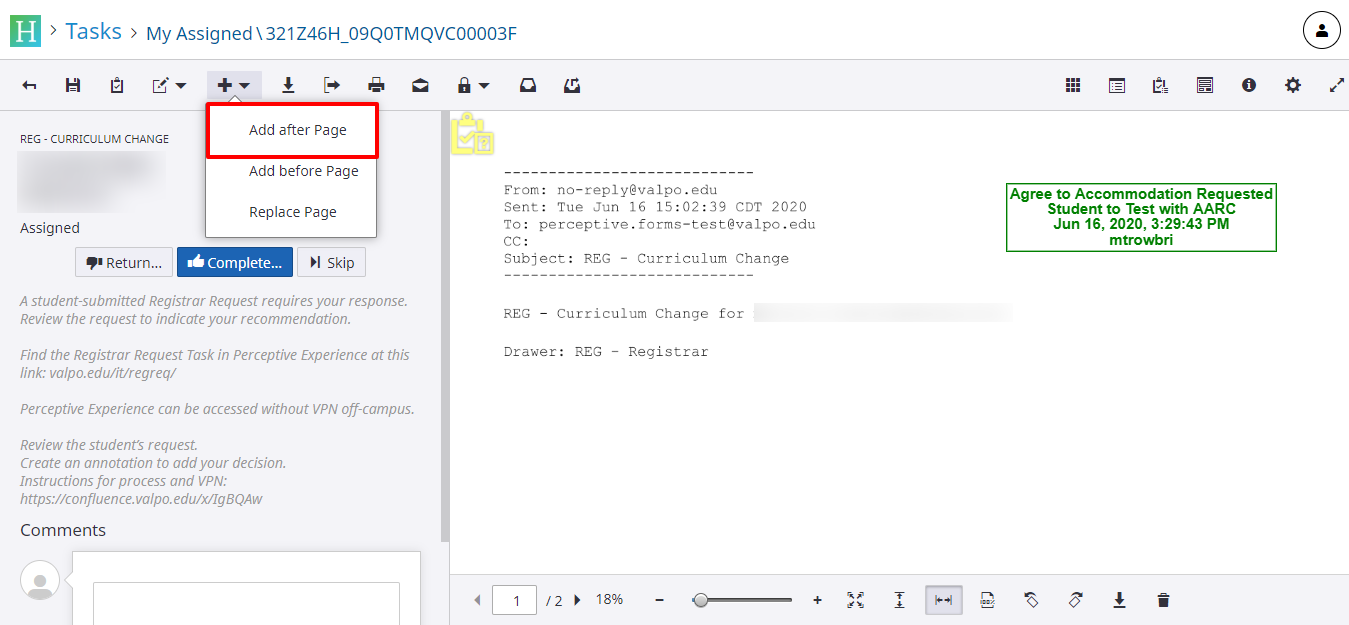
- To upload your exam as a PDF or Word Doc, click the + sign in the toolbar, and select Add after Page
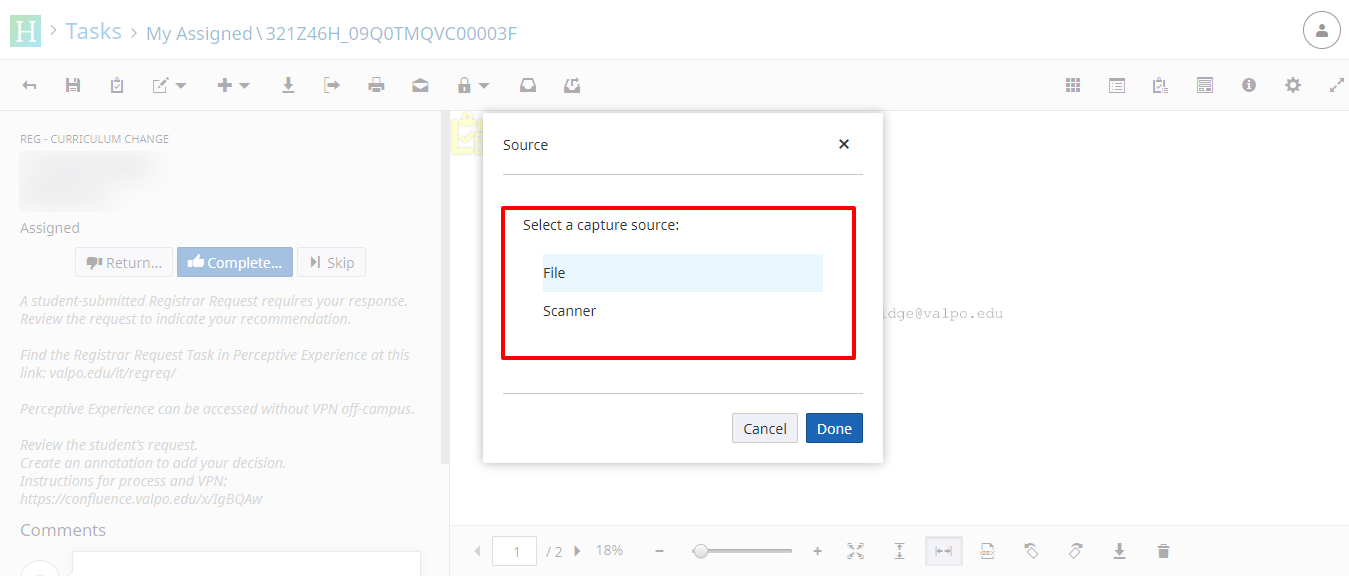
- You will then be prompted to add your exam file, select FILE and then browse to the location of your exam file on your device, select it, and click Done.
- If you scroll through the pages, you should now be able to see your exam file appended to the approval document.
Completing Review of the Document (sending it to the next person)
- In the left hand panel, select Complete, then Reviewed Document.
- You may also add text comments in the "Comments" box. These will be seen by subsequent reviewers, but do not become part of the permanent document.
- Save changes, click "Yes."
Video Training
A YouTube video is available as a visual reference for this process.
Related articles
