Advising Resources in Colleague Self Service Student Planning
- Melanie Steider2
- Allison Urbanczyk
How to use the tools that are unique to the Advising Menu in Self-Service Student Planning (DataVU)
Advising Menu
- From the Main Menu in Colleague Self-Service, the Advising menu may be selected either from the menu boxes or from the Daily Work icon in the left-hand column menu.
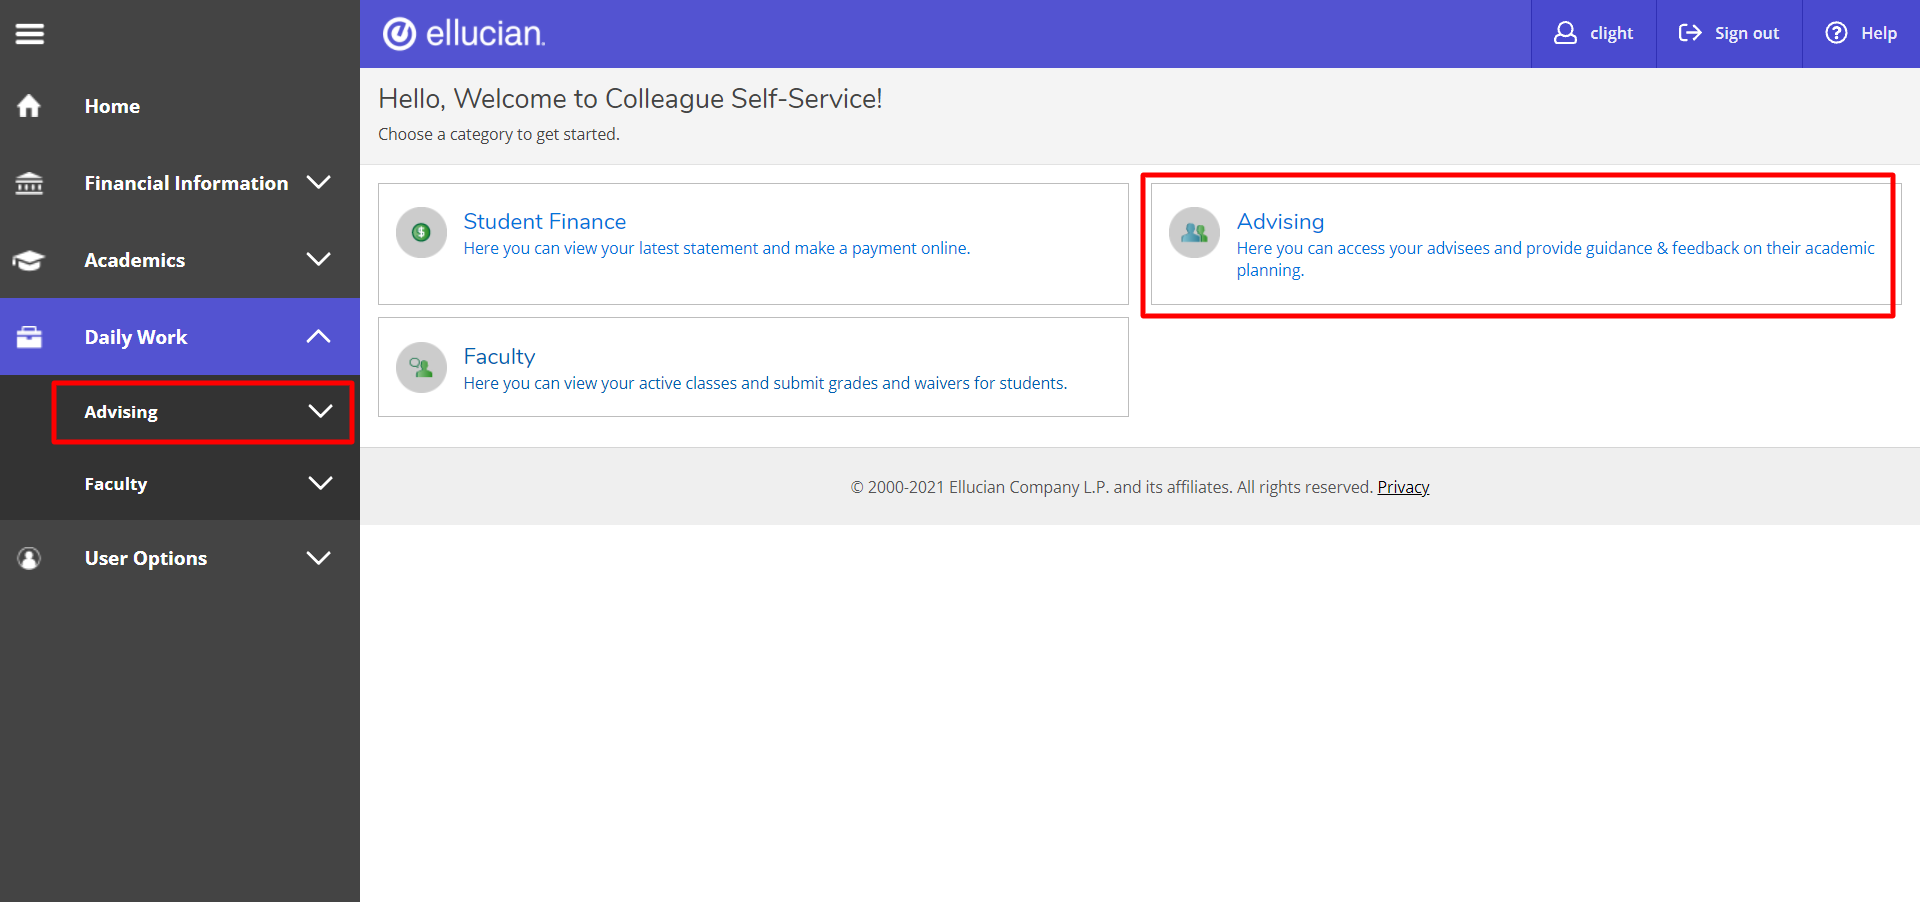
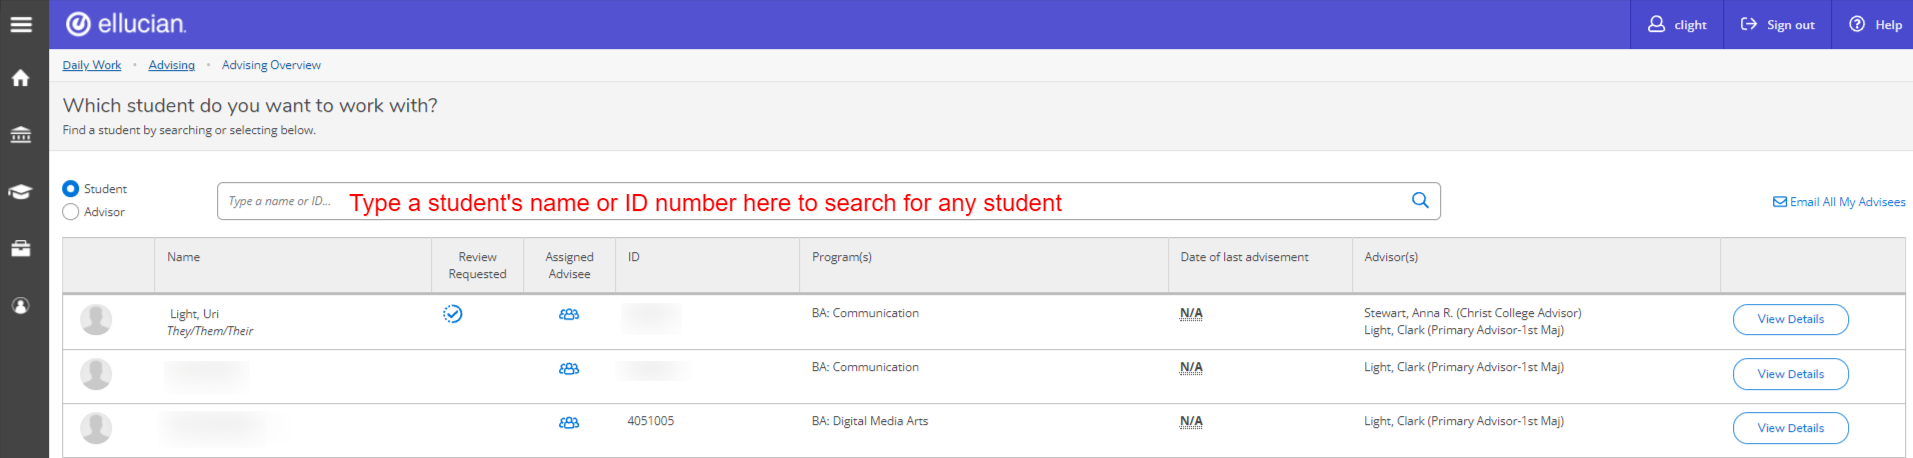
- Upon opening the Advising Menu, your assigned advisees (for whom you are the primary advisor) will generally be listed in alpha order by last name
- You may also search for a student who is not your assigned advisee using their name or student ID number
Review Requested
- If a student has Requested a Review, the student(s) will be shown at the top of your list of advisees, with a checkmark icon in the Review Requested column
- You will also see a notification in the upper right-hand corner that you have one or more advisees who have requested a review
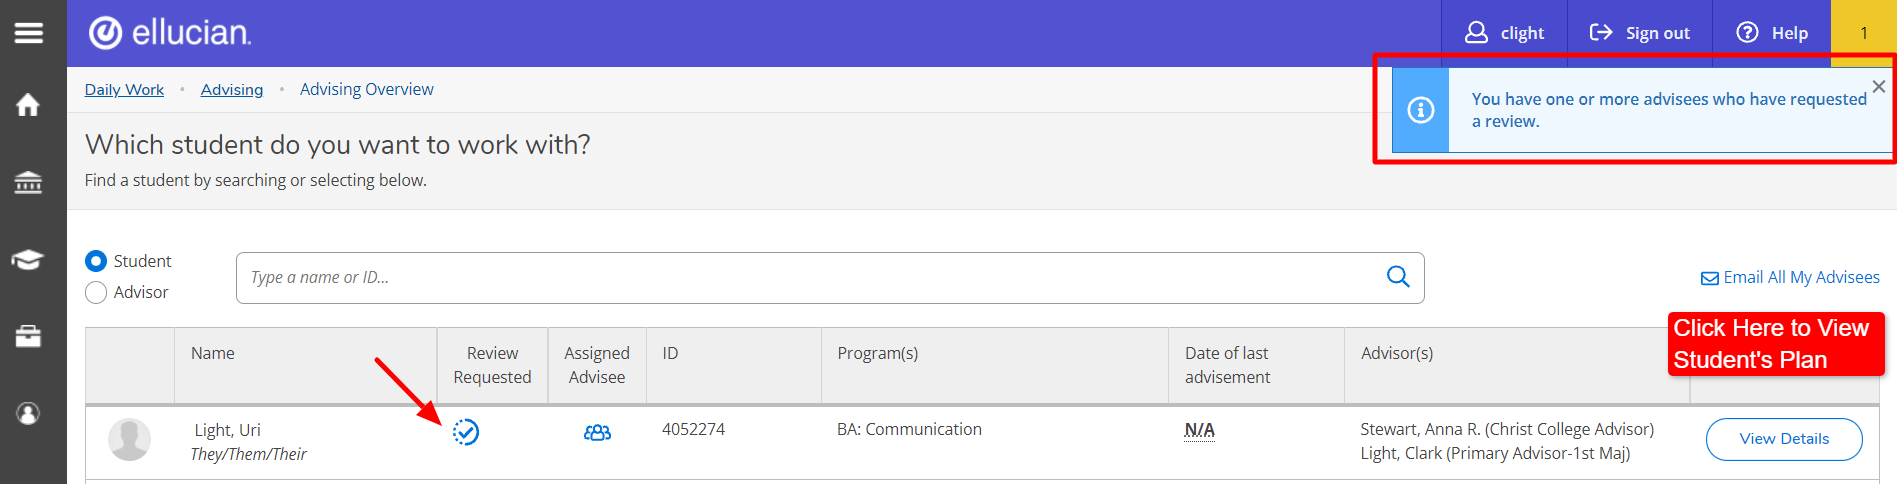
- To review the student's plan, click View Details in the far right column next to their name.
Complete Review
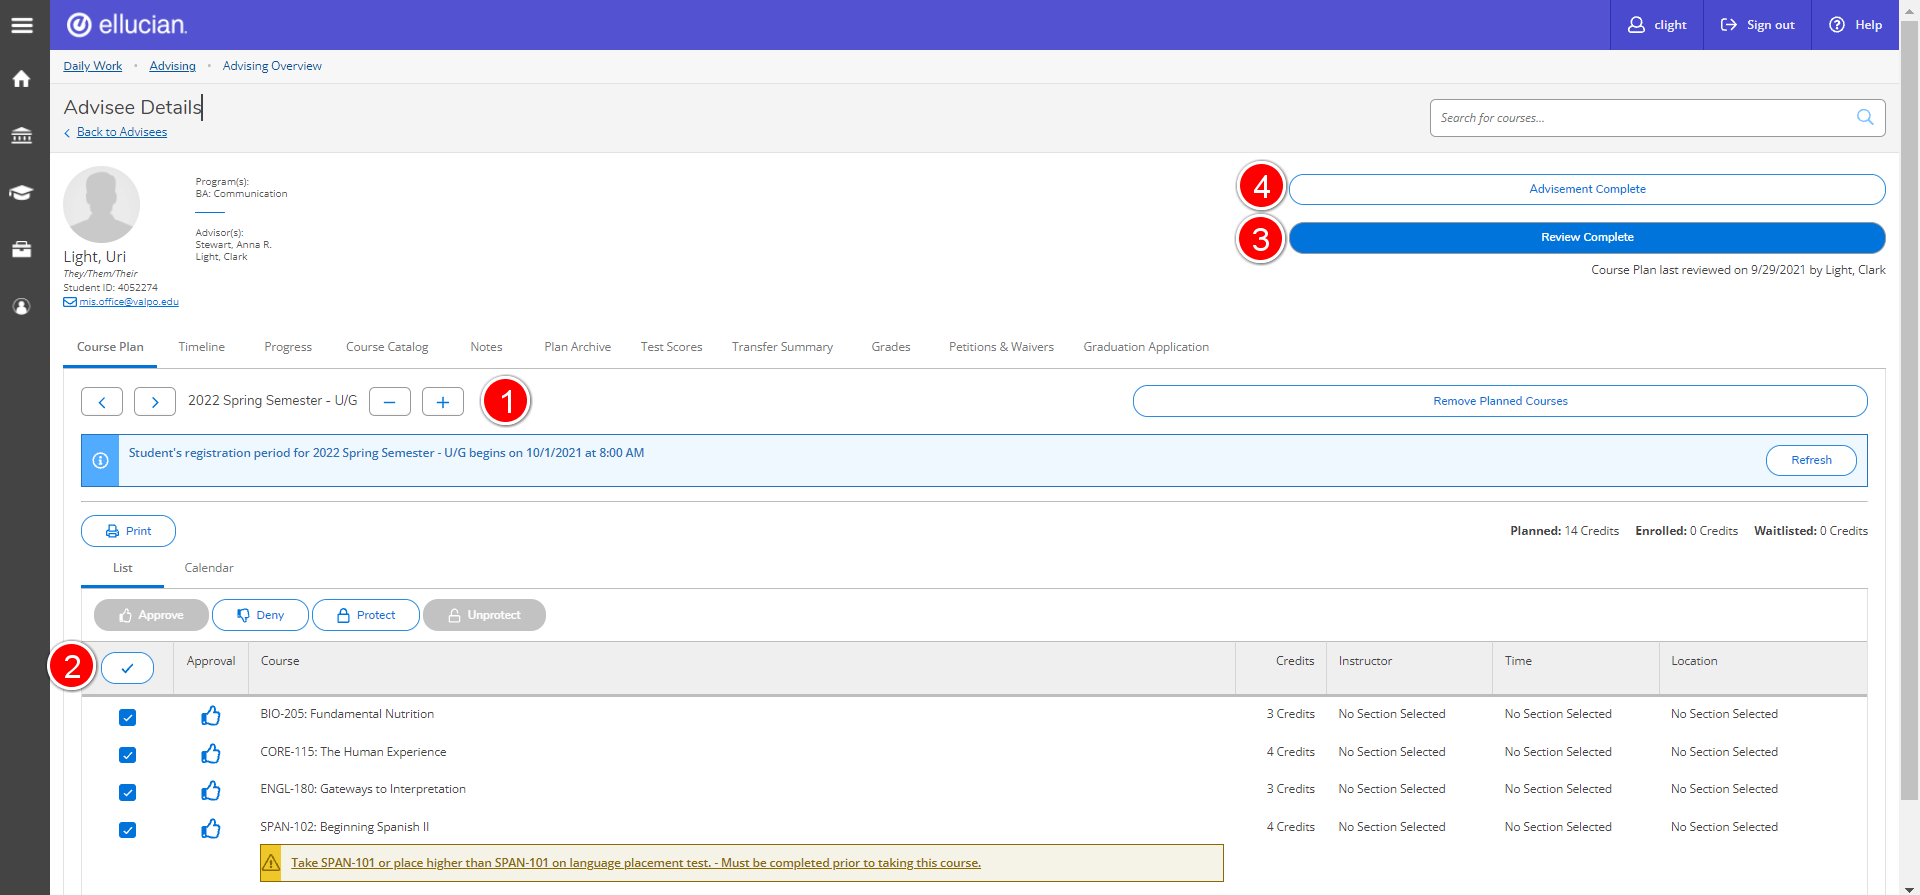
The Complete Review button lets the student know that you have reviewed and approved their planned courses - this could be for a single term, or for their entire plan of study and can be done at any time. Things to consider/look at when completing a review:
- Select the term (1) you would like to review - you may review several terms as part of a single review if the student has done planning beyond the upcoming term.
- You may select to approve courses individually, or all for a term by clicking the checkbox in the column heading (2). Each approved course will then have a thumbs up icon (or thumbs down if denied)
- Once you have completed a review of all terms, click 'Review Complete'(3). You will be asked if you would like to Archive the Plan. It is recommended to archive the plan after an advising session, or anytime the student is making significant changes to their plan of study. Archived plans are saved as .pdfs and can be reviewed at a later date by any advisor.
Review Complete does NOT allow the student to register
Review Complete does not 'release the advising hold' to allow a student to register for an upcoming term. You must select 'Advisement Complete' to allow registration.
Advisement Complete
- When you have reviewed a student's planned courses for an upcoming registration term, click 'Advisement Complete'(4) to release the student's advising hold and allow them to register for courses when their registration window opens.
- The student's registration time is shown in both the Student View for the registration term and the Advisor View for the registration term.
- After a student's opening time has passed, the blue Register Now button will be visible in the student view, but the date and time of their registration window will no longer show.
Advisee Details Tabs
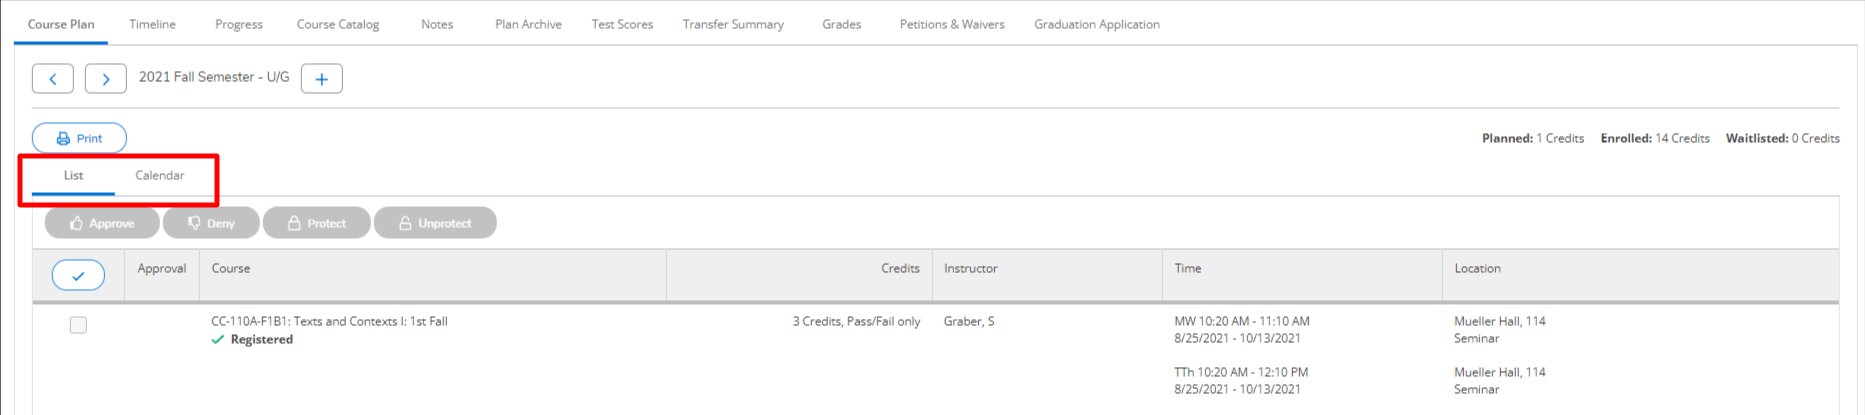
Course Plan
The Course Plan tab shows a detailed view of both the student's current schedule of courses and allows an advisor or student to view previously taken and future planned courses by using the arrow tabs to change terms, or the plus or minus buttons to add or remove future terms.
Course selection can include up to three steps in the process:
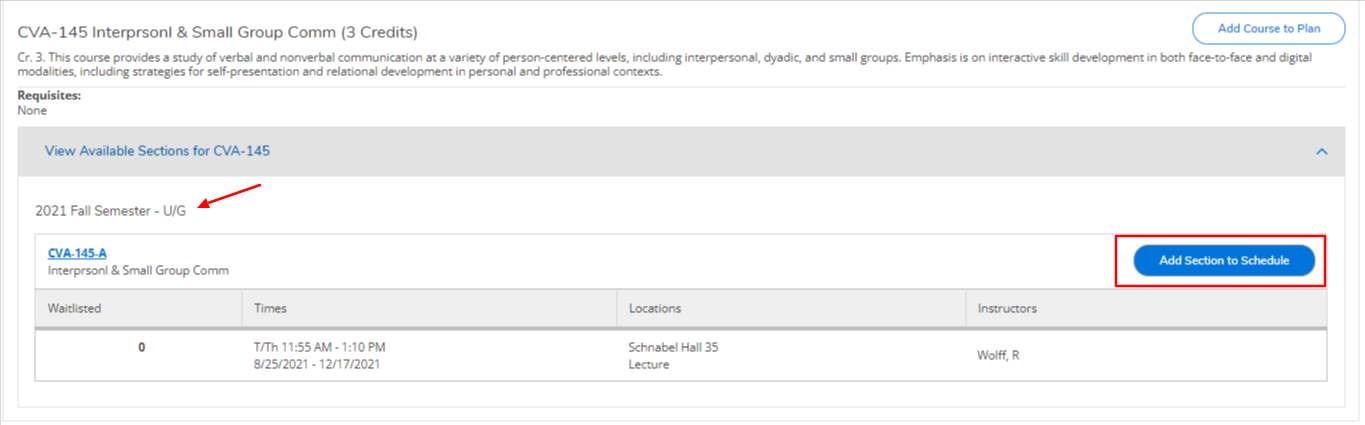
- Add Course to Plan - this adds the course to the student's future plan, no section is selected and a planned course may be removed or moved at any time by either the student or any advisor
- Add Section to Schedule - this adds a specific section of a course, within a specific academic term to the student's plan
- Register Now - this is the step that actually registers the student for the course
- Only the student can select Register
- The Register Now button is only available if the student is eligible for registration, up through the end of the Add/Drop period of the term
- In the student's registered courses, a Drop button will appear from the time of registration through the end of the Add/Drop period of the term.
If the student wishes to change sections, or drop and add a course within the same term add the course to the plan BEFORE clicking drop. The student will be prompted to 'swap' for a different course when selecting Drop.
Helpful Tip for Changing Sections
This process is useful in an instance where a course and lab are co-requisites, and the student wants to keep the lecture section, but change lab sections (or vice-versa). By adding the desired section to the Plan the student will be able to swap, rather than having to drop both components and risk losing a seat.
In the advising view, an advisor can select to view the student's planned courses in either a list view or a calendar view (the student view is calendar only, but if they select the print option a list view will display on screen)
Asynchronous Online Courses in Calendar View
In the calendar view, asynchronous online courses will be listed directly beneath the calendar since they do not have a scheduled day or time.
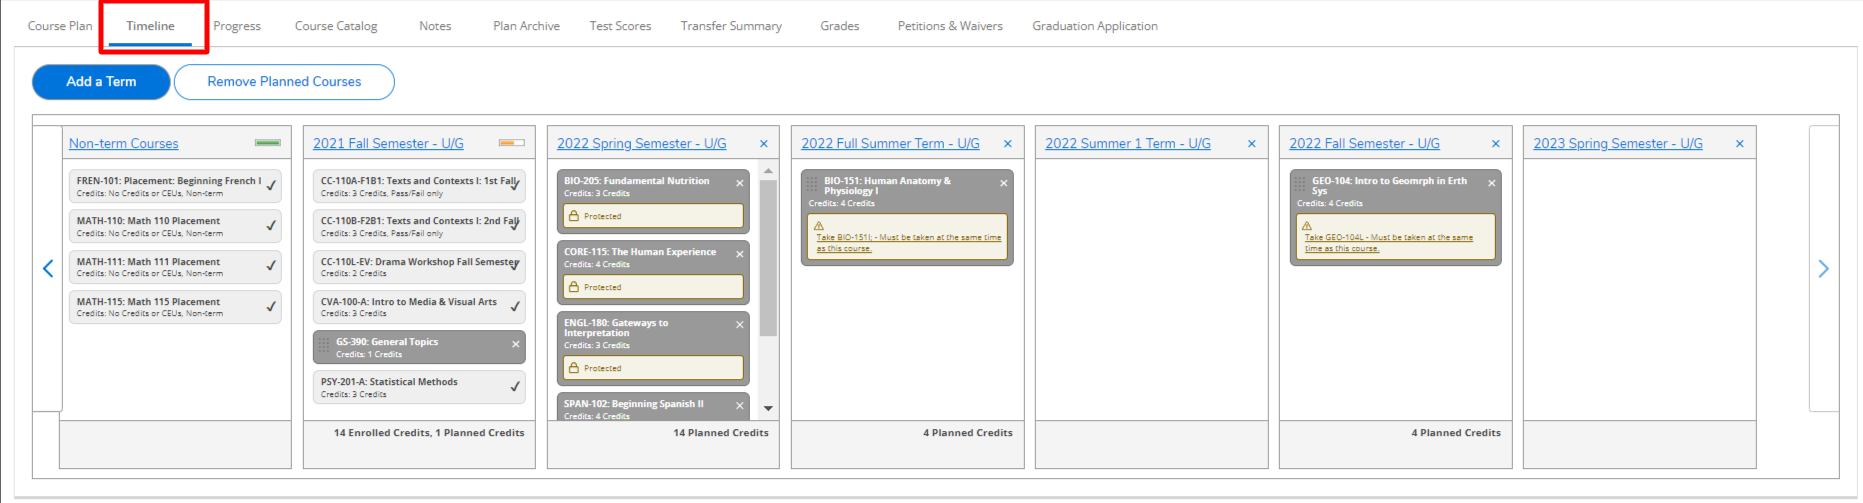
Timeline
The Timeline tab shows a summary/snapshot view of a student's previously taken, current, and future planned courses including grades.
- Non-Term Courses reflect anything not completed at Valpo, including placement tests, transfer, or AP credit.
- Planned courses may be moved to a different future term by dragging and dropping in the desired box.
- Planned courses or terms may be removed from the plan by clicking the x in the upper right-hand corner.
Progress
In Development - Not Yet Operational
Please use Program Evaluation rather than My Progress. Ellucian is working to resolve issues reported by institutions to make My Progress an accurate reflection of requirements, approved exceptions on record for individual students, and progress toward degree completion. Valpo students and advisors will continue to use Program Evaluation in the meantime.
The Progress tab shows the student's progress toward completing their degree requirements, similar to a degree audit.
- The top of the page shows a summary overview of the student's progress in:
- Completing requirements (reflected as a percentage of requirement blocks completed)
- Total Credits earned (green are complete, yellow are planned)
- Total Credits from Valpo (green are complete, yellow are planned)
- Under the Requirements heading, each sub-heading can be expanded or collapsed by using the 'Hide Details' button
- Each Requirement Block (for example A. The Valpo CORE I) shows completion status, as does each component or course within the block
- In-Progress = the student is enrolled in the current active term

- Registered = the student is registered for a term that has not yet begun
- Planned = the student has planned the course for a specific term

- Not Started = the student has neither planned nor registered for this course

- In-Progress = the student is enrolled in the current active term
- The Advisor or the student can select courses directly from the Progress listing to add to the student's plan by either clicking on the Course Number, or the Search button
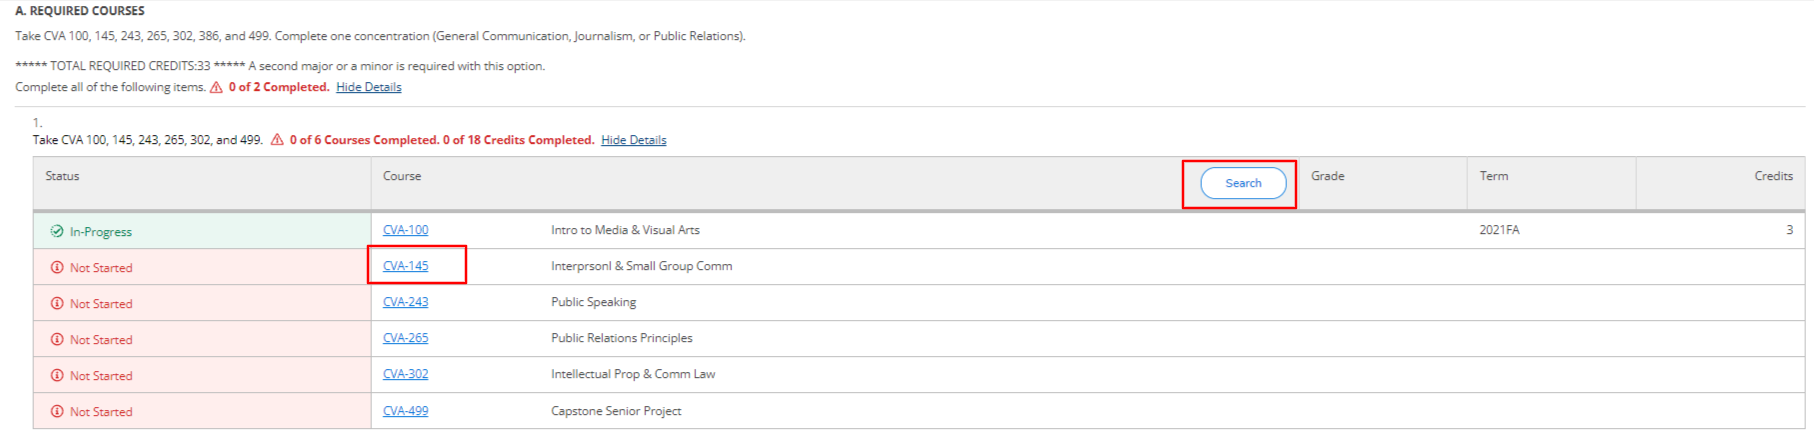
- This will open the course, or group of courses, in the Course Catalog tab where either Add Course to Plan or View Available Sections (then Add Section to Schedule) can be selected.
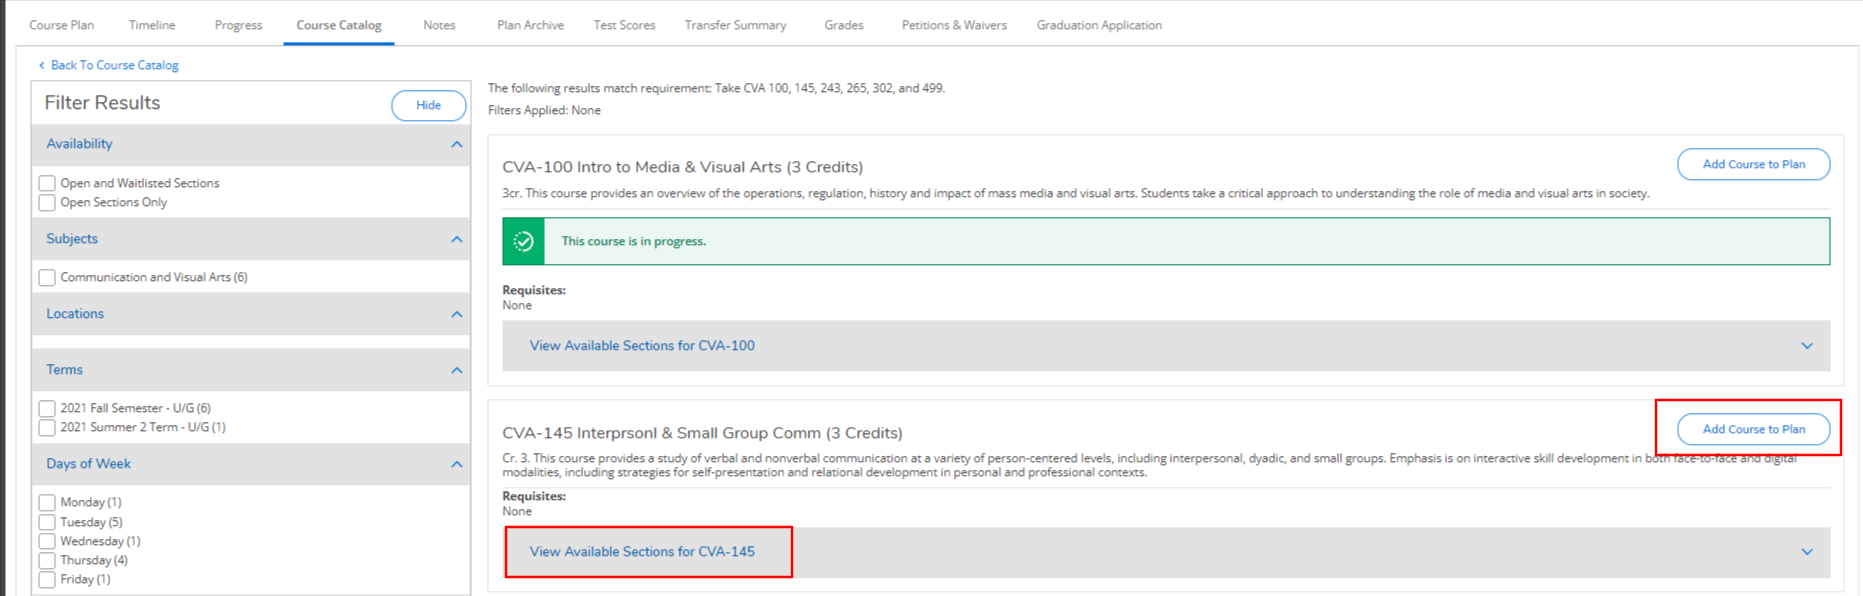
- When using Add Section to Schedule confirm that the correct term is selected.
Course Catalog is reviewed in a separate article
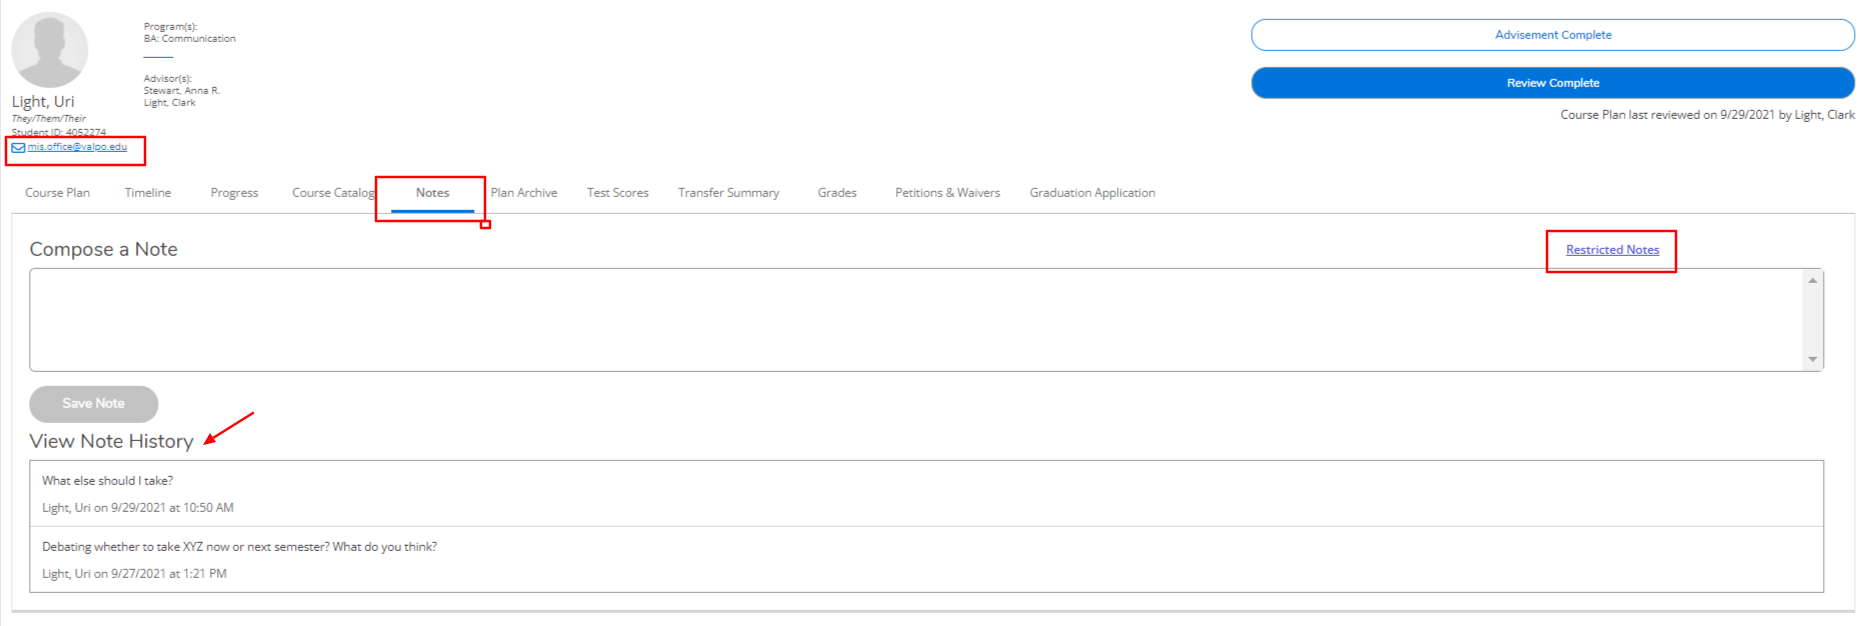
Notes
Related articles